How to Customize LLMs with Ollama
March 9, 2024

Ollama offers a compelling solution for large language models (LLMs) with its open-source platform, user-friendly interface, and local model execution. Its customization features allow users to tailor LLMs to their needs by modifying prompts and parameters. Ollama’s API integration facilitates seamless interaction with models programmatically, enhancing workflow integration. With support from a vibrant community, Ollama provides a resource-efficient solution for exploring and utilizing LLMs in natural language processing tasks.
To install Ollama and customize your own large language model (LLM), follow these step-by-step instructions:
Step 1 → Introduction to Ollama
- Understand that Ollama is an open-source tool created by Jeffrey Morgan.
- It facilitates downloading, running, and customizing large language models.
Step 2 → Download and Install Ollama
- Visit the Ollama website and download the installer. (https://ollama.com/)
- Run the installer to complete the installation process.
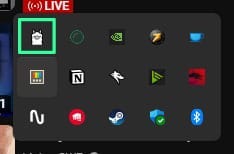
- After installation, locate the Ollama icon in your menu bar.

Step 3 → Access Ollama in Terminal
- Open your terminal.
- Type ollama to check the available commands and ensure Ollama is installed correctly.

Step 4 → Explore Models and Download One Model
- ollama list to get a list of your installed models.

- Navigate to the Ollama website’s models section. (https://ollama.com/library)
- Choose a model, e.g., “phi” by Microsoft. (https://ollama.com/library/phi)
- Copy the command provided on the model’s page to download it. (ollama run phi)

- Paste and run the command in your terminal to download the chosen model.
Step 5 → Interact with the Model
- Start chatting with the downloaded model using the terminal.

- Test its responses to various prompts and questions to ensure it’s functioning correctly. Small models like ‘phi’ can be sometime struggle with answering questions sometimes. Since you know how to download and install a model, you can choose one on your own.
Step 6 → Accessing Ollama via API
- Understand that Ollama provides an API for programmatic interaction with the model.
- Use tools like curl to make HTTP requests to the Ollama API endpoint.
curl <http://localhost:11434/api/chat> -d '{
  "model": "phi",
  "messages": [
    { "role": "user", "content": "what is blockchain ?" }
  ]
}'
- This above curl command demonstrates how to make an HTTP POST request to the Ollama API endpoint to interact with the model programmatically. It sends a prompt to the "phi" model and retrieves the model's response.
- Retrieve responses from the model using the API for integration into other applications or services.
{"model":"phi","created_at":"2024-03-09T07:03:22.0688607Z","message":{"role":"assistant","content":" Blockchain"},"done":false}
{"model":"phi","created_at":"2024-03-09T07:03:22.1454531Z","message":{"role":"assistant","content":" is"},"done":false}
.......
{"model":"phi","created_at":"2024-03-09T07:03:24.3851968Z","message":{"role":"assistant","content":"\\n"},"done":false}
{"model":"phi","created_at":"2024-03-09T07:03:24.3988951Z","message":{"role":"assistant","content":""},
"done":true,"total_duration":2540989500,"load_duration":1001100,"prompt_eval_count":7,"prompt_eval_duration":209832000,"eval_count":153,"eval_duration":2329176000}
Step 7 → Customize the Model
- Access the model file to understand its structure and parameters. Use ollama help show to show all the commands.
ollama show phi --modelfile
# Modelfile generated by "ollama show"
# To build a new Modelfile based on this one, replace the FROM line with:
# FROM phi:latest
FROM C:\\Users\\{YourUsername}\\.ollama\\models\\blobs\\sha256-04778965089b9190932bf8812e828
TEMPLATE """{{ if .System }}System: {{ .System }}{{ end }}
User: {{ .Prompt }}
Assistant:"""
SYSTEM """A chat between a curious user and an artificial intelligence assistant. The assistant gives helpful answers to the user's questions."""
PARAMETER stop "User:"
PARAMETER stop "Assistant:"
PARAMETER stop "System:"
- Copy the model file to create a customized version. ollama show phi --modelfile > new.modelfile
- Open and modify the system prompt and template in the model file to suit your preferences or requirements. code new.modelfile
# Modelfile generated by "ollama show"
# To build a new Modelfile based on this one, replace the FROM line with:
# FROM phi:latest
FROM C:\\Users\\User\\.ollama\\models\\blobs\\sha256-04778965089b91318ad61d0995b7e44fad4b9a9f4e049d7be90932bf8812e828
TEMPLATE """{{ if .System }}System: {{ .System }}{{ end }}
User: {{ .Prompt }}
Assistant:"""
SYSTEM """A chat between a curious user and an artificial intelligence assistant that expertise in blockchain and web3. The assistant gives helpful answers to the user's questions including the benefits of web3 and blockchain."""
PARAMETER stop "User:"
PARAMETER stop "Assistant:"
PARAMETER stop "System:"
Step 8 → Create Your Custom Model
- Use ollama help create to get commands related to creating a new model.

- Use the ollama create command to create a new model based on your customized model file.
ollama create new-phi --file new.modelfile

- Verify the creation of your custom model by listing the available models using ollama list.

- Run your new model and test with a prompt. ollama run new-phi
Step 9 → Test Your Custom Model
- Chat with your custom model using the terminal to ensure it behaves as expected.

- Verify that it responds according to the customized system prompt and template.
By following these steps, you’ll be able to install Ollama, download and interact with models, customize your own model, and begin exploring the world of large language models with ease.
Also dont forget to check my personal website: laxnz.me