Postman 101: A Beginner’s Guide to API Testing
May 4, 2024
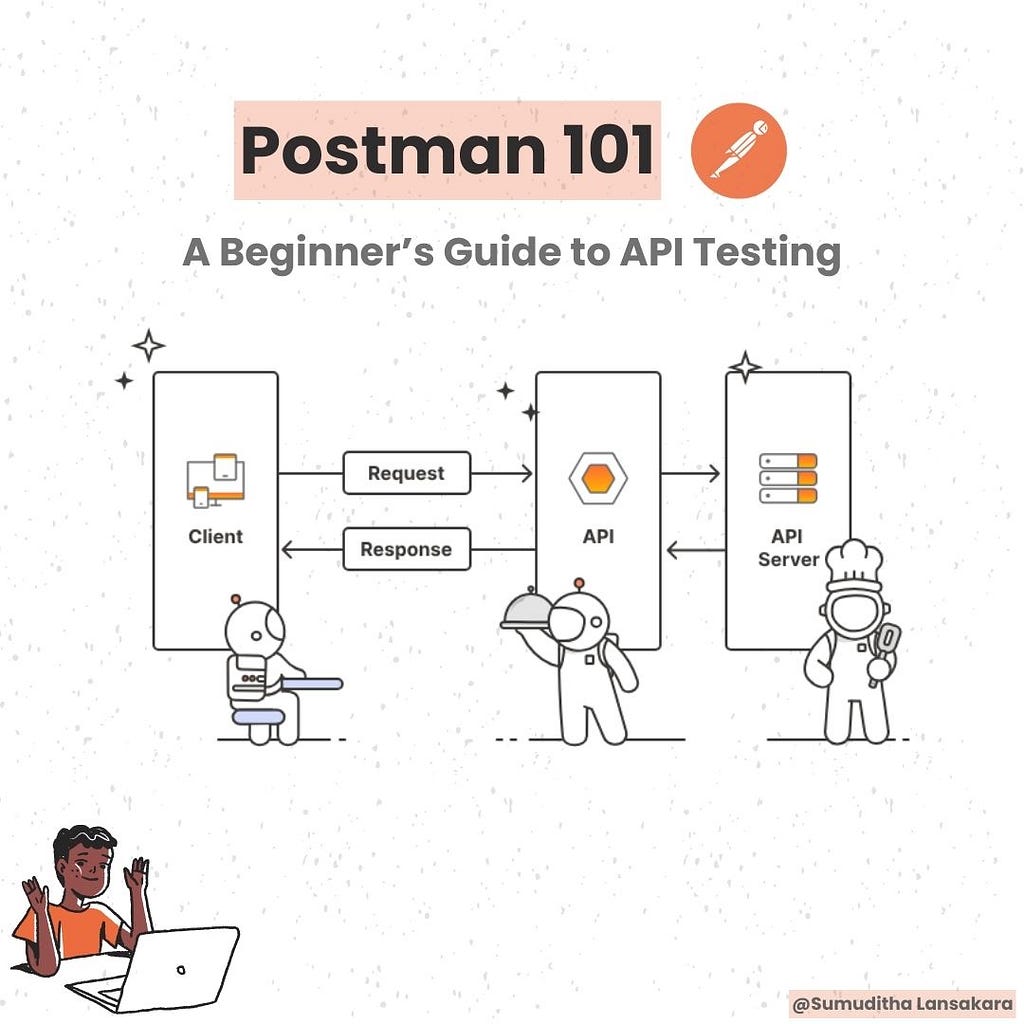
What is Postman ?
Postman is a software application that acts as a platform for developers to work with APIs (Application Programming Interfaces). It simplifies the entire lifecycle of APIs, from designing and building them to testing and documenting them.
Why Use Postman ?
- Simplified API Interaction → Postman provides a user-friendly interface for sending HTTP requests (like GET, POST) to APIs and viewing the responses.
- Efficient API testing → Send various requests & analyze responses to identify bugs.
- Streamlined workflow → Design, build, test, document & collaborate on APIs in one place.
- Collaboration features → Share requests, environments & documentation for teamwork.
- Versatile → Supports mock servers, code generation & authentication methods.
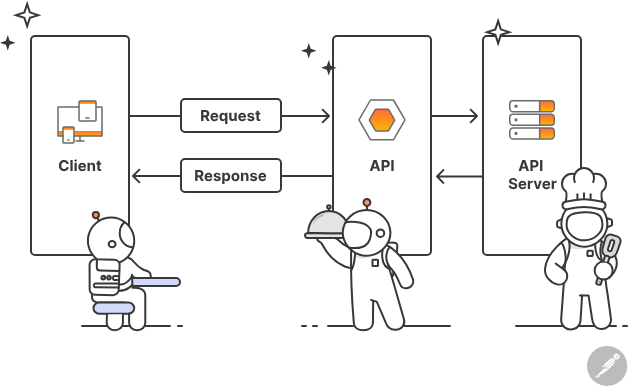
What is an API ?
An API (Application Programming Interface) is like a bridge between different software programs. It helps them talk to each other and share information. Think of it as a menu in a restaurant — it tells you what dishes you can order and how to ask for them. Similarly, an API tells one program how to request data or perform tasks from another program.
How to install Postman ?
You can either install postman in your local or use the website. It’s recommended to use the postman software locally, if you are doing testing more frequently.
Postman website → https://www.postman.com
Download postman → https://www.postman.com/downloads/
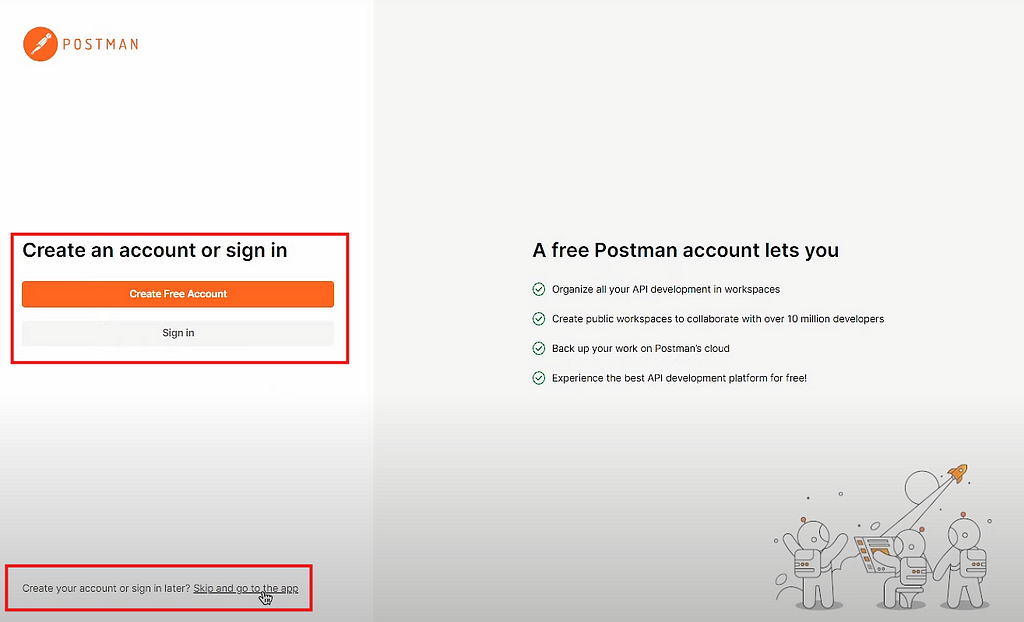
After you downloaded the postman, you can create or sign in to your account or you can skip that part and go to the app. I’m gonna simply sign in to my account.
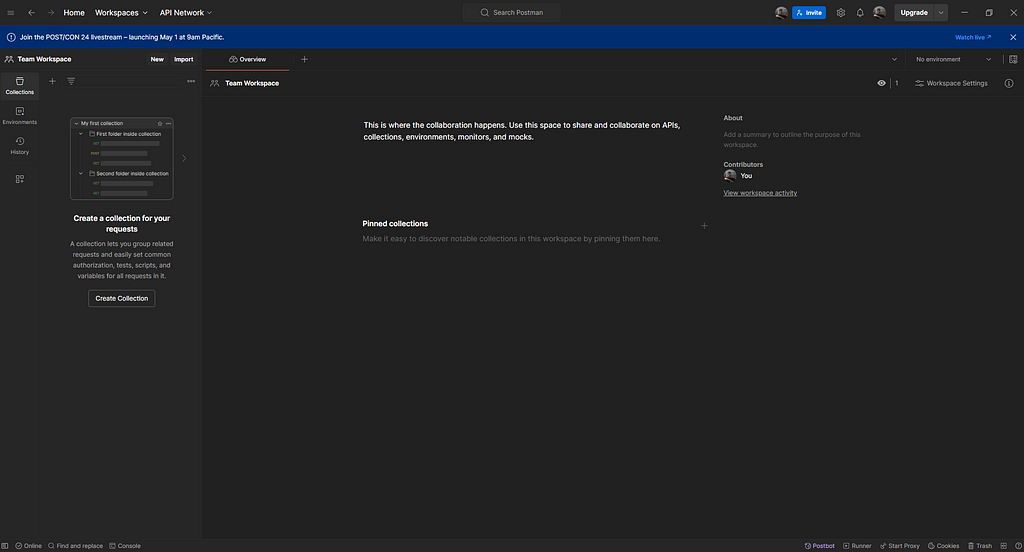
Then you will move into your app.
— — — — — — — — — — — — — — — — — — — — — — — — — — — — — — — — — — — — — —
Getting Started with Postman
In the left side on your postman, you can see a Create Collection button. You can either use that or the + icon to create a collection.
Collections → Postman Collections are a group of saved requests. Every request you send in Postman appears under the History tab of the sidebar.
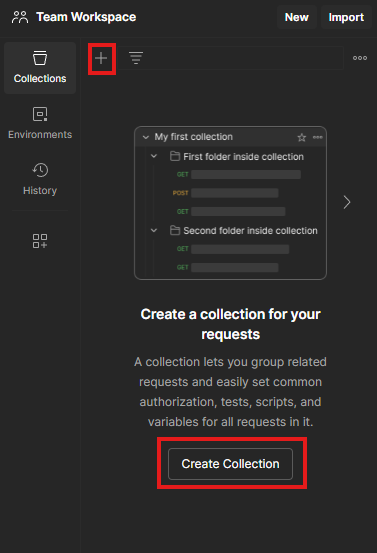
Create you first collection and give it a name. We’re going to save all our requests in this collection (I usually create one collection per one project that I do testing for then folders to group them inside a collection).

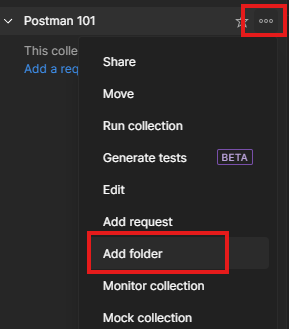
Then create subfolders for group your APIs (Auth, Stripe, Rest, …). Click on 3 dots in your collection tab and Add folder.

Now we’re going to create our first request. For that you can simple click on the Add a request under your folder or click on the 3 dots on your folder. Then click on Add request.
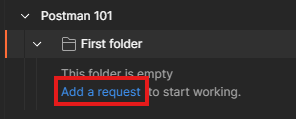
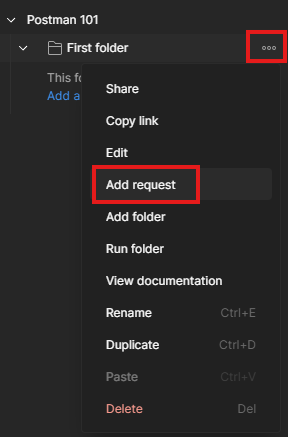
You can give your request a name and change the request method.
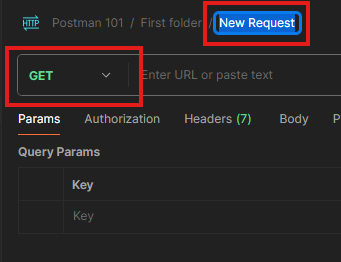
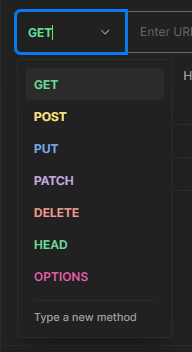
These are the basics of creating your API request.
— — — — — — — — — — — — — — — — — — — — — — — — — — — — — — — — — — — — — —
From now we’re going to start testing. For this we will use the Simple Books API by Valentin Despa.
Simple Books API GitHub (Endpoints) → https://github.com/vdespa/introduction-to-postman-course/blob/main/simple-books-api.md
Simple Books API (Base URL) → https://simple-books-api.glitch.me
- Create a new separate folder to save these new requests.
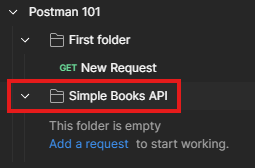
1. GET List of Books
- First create a request on your Simple Books API folder and name it as GET List of Books.
- Request method is GET.
- Copy the API URL https://simple-books-api.glitch.me and paste it in the request URL.

- Then add the API endpoint for get all the books, at the end of the request URL.

- Now Send your request. (CTRL + ENTER / COMMAND + ENTER)
- In the body section you can see your response, if you have successfully got the response.
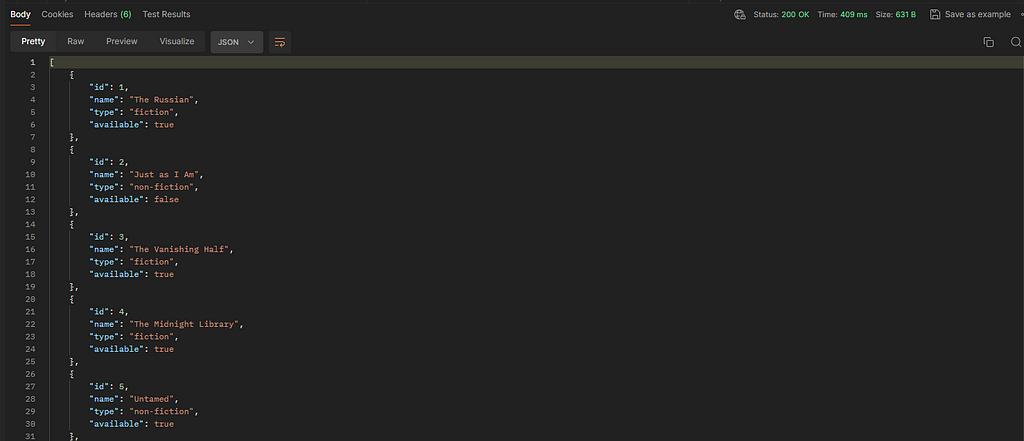
- In the response body section you can see some important information like the Status Code, Response Time and Response Size.

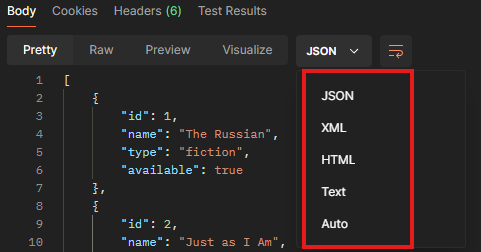
- Also we can change the response type and the preview of the response (Pretty is the most organized way).
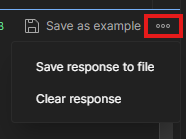
- Or save it as an example or a response file if you want to export it.
- After you done with this testing you can save this request. For that you can either use CTRL + S / Command + S or the Save button (Orange dot in your request show that you have unsaved changes).


- Now you have successfully done with testing the GET request.
2. GET List of Specific Type of Books using Query Parameters
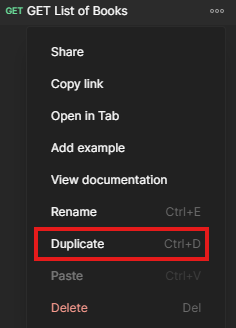
- Since we already have a GET request, I’m going to duplicate that same request. For that you can simple click on the request and press CTRL + D / Command + D or click on the 3 dots and Duplicate it.
- Then change the request name into GET List of Books using Type.

- Now to get specified type of book list, we have to filter out the unnecessary data. For this we will use query parameters (read more from the links that I have mentioned at the bottom of this article). This is a way of sending data with our request. In postman we don’t have to manually add query parameters to our URL. (If you want to add the query parameter manually it still possible ?type=fiction)
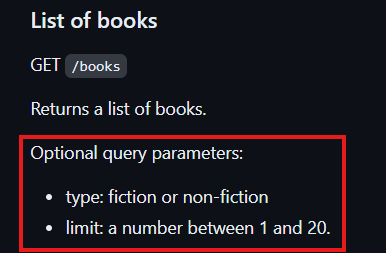
- Open your Params tab and write your query parameter. We have two options of query params for this GET List of Books endpoint.
- In the previous GET List of Books we had two types of books. Will see how we can get only the fiction books using query parameter.
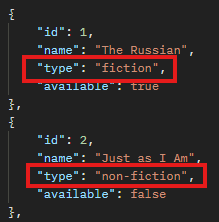
- Now we are going to use the type as key and fiction as value for our query parameter. When I enter the key and value, it will automatically update my URL.

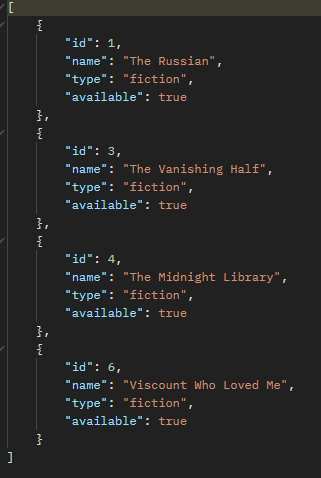
- Then send your request and check the response that you get. It should be a list that only have books with type fiction.
3. GET a Single Book using Path Parameters
- Again I’m going to duplicate my GET List of Books request and change the name to GET a Single Book.
- Now we’re going to add the path parameter to our base URL. To do that after the base URL we have books endpoint. Then we enter our path parameter :bookId.

- When you add this parameter, you can see postman will automatically give you the key-value pair for path variables (Params section).

- Now give the book id you want to get and send the request.

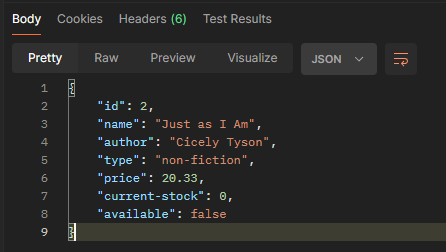
- If you want to directly pass your book id, you can add it after the books endpoint.

4. POST Method for Login
- To this POST part we can’t use the Simple Books API. Because to submit an order we have to pass authorization (Bearer Token) in our request body. Since we don’t have the auth token, we can’t POST to this API route.
- Because of that I will be using a local hosted Login API.
- First I will create a new request and name it as User Login. Then change the request method into POST.

- I’m going to select use raw. Then from the dropdown I’m gonna select the data type as JSON.
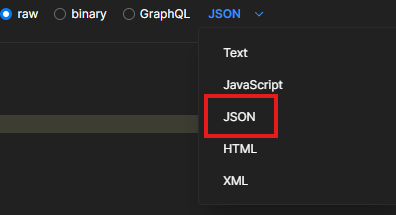
- Then provide the email and password in JSON format.

- After sending the request you will get the login successful message.

- This is how you can send data in request body for POST method.
Remember, this guide covers only the basics of Postman. I encourage you to explore further to unlock its full potential. Try out different features and tools, and don’t hesitate to dive into more advanced functionalities. Postman offers plenty of resources to help you along the way. Enjoy exploring!
Further Readings
- Organize and automate API requests in Postman Collections → https://learning.postman.com/docs/collections/collections-overview/
- Multi-level folders and folder reordering → https://blog.postman.com/multi-level-folders-and-folder-reordering/
- What are HTTP methods ? → https://blog.postman.com/what-are-http-methods/
- Query Parameters → https://www.branch.io/glossary/query-parameters/#:~:text=Query parameters are a defined,on the data being passed.
- Path Parameters → https://www.abstractapi.com/api-glossary/path-parameters
- Send parameters and body data with API requests in Postman → https://learning.postman.com/docs/sending-requests/create-requests/parameters/
- API authentication and authorization in Postman → https://learning.postman.com/docs/sending-requests/authorization/authorization/
- Generate client code for your API collections → https://learning.postman.com/docs/developer/code-generators/